
HDMAs, or Horizontal DMAs, are DMAs that are run on every scanline in the HBlank (horizontal blanking) area. They use the same 8 channels
Since the HBlank area is rather short, the HBlanks are often used to change e.g. the Backdrop color, or the scrolling registers. They can also define if that effect should be applied to the current line, or on multiple consecutive lines.
HDMAs are, just like the normal DMAs, enabled with a single write to a register, 0x420C, where each set bit enabled a HDMA. This is why the game developer has to make sure he has all DMAs configured / handled before writing here.
case 0x420c:	//	DMA - HDMAEN - Select H-Blank DMA (HDMA) Channel(s) and start Transfer (W)
	for (u8 i = 0; i < 8; i++) {
		HDMAS[i] = DMA((val >> i) & 1);
	}
	break;
...
Since HDMAs are not run in VBlank, but are actually reset there (so they can start fresh in the next frame), we can make a function that will set and reset all our necessary values in VBlank (vertical blanking).
For the sake of simplicity and code that is better readable, I created a class for the DMAs and HDMAs, that contains all the useful information we need to process:
struct DMA {

public:
	bool enabled = false;
	bool repeat = false;
	bool terminated = false;
	u8 directon = 0;
	u8 addressing_mode = 0;
	u8 dma_mode = 0;
	u8 IO = 0;
	u32 indirect_address = 0;
	u8 line_counter = 0;
	u32 aaddress = 0;
	u32 address = 0;

	DMA() {};
	DMA(bool e) {
		enabled = e;
	}
};
Most fields we are already familiar with, but a short recap:
enabled – Is this DMA enabled or not?
repeat – Repeat the process or are we done?
terminated – Flags if this DMA is done with its for this frame
direction – From A-Bus to B-Bus, or from B-Bus to A-Bus
addressing_mode – Direct or Indirect (address holds pointer to HDMA data table)
dma_mode – Which byte transfer mode (see DMA chapter)
IO – This added with 0x2100 forms the target register
indirect_address – only used with indirect addressing mode
line_counter – dictates for how many lines this DMA is executed
aaddress – base address
address – incremented effective address
With this information we can now create our set/reset function (you can see all the relevant registers in the code, I’ll refrain from illustrating these again for now).
void BUS_resetHDMA() {
	u8 dma_id = 0;
	for (u8 dma_id = 0; dma_id < 8; dma_id++) {
		if (HDMAS[dma_id].enabled) {
			HDMAS[dma_id].terminated = false;
			HDMAS[dma_id].IO = memory[0x4301 + (dma_id * 0x10)];
			HDMAS[dma_id].addressing_mode = (memory[0x4300 + (dma_id * 0x10)] >> 6) & 1;
			HDMAS[dma_id].directon = memory[0x4300 + (dma_id * 0x10)] >> 7;
			HDMAS[dma_id].dma_mode = memory[0x4300 + (dma_id * 0x10)] & 0b111;
			HDMAS[dma_id].indirect_address = (memory[0x4307 + (dma_id * 0x10)] << 16) | (memory[0x4306 + (dma_id * 0x10)] << 8) | memory[0x4305 + (dma_id * 0x10)];
			HDMAS[dma_id].aaddress = (memory[0x4304 + (dma_id * 0x10)] << 16) | (memory[0x4303 + (dma_id * 0x10)] << 8) | memory[0x4302 + (dma_id * 0x10)];
			HDMAS[dma_id].address = HDMAS[dma_id].aaddress;
			HDMAS[dma_id].repeat = memory[HDMAS[dma_id].address] >> 7;
			HDMAS[dma_id].line_counter = memory[HDMAS[dma_id].address] & 0x7f;
			//	initial transfer
			HDMAS[dma_id].address++;
			if (HDMAS[dma_id].addressing_mode) {		//	0 - Direct, 1 - Indirect
				HDMAS[dma_id].indirect_address = (memory[HDMAS[dma_id].address + 1] << 8) | memory[HDMAS[dma_id].address];
				HDMAS[dma_id].address += 2;
				BUS_DMAtransfer(dma_id, HDMAS[dma_id].dma_mode, HDMAS[dma_id].directon, 0, HDMAS[dma_id].indirect_address, HDMAS[dma_id].IO, 100);
			}
			else {
				BUS_DMAtransfer(dma_id, HDMAS[dma_id].dma_mode, HDMAS[dma_id].directon, 0, HDMAS[dma_id].address, HDMAS[dma_id].IO, 100);
			}
		}
	}
}
Now we just make sure this gets called on VBlank – and while we are at it, we will also put in a function call to run our HDMAs (we will create the function right after this)
if (++RENDER_X == 256) {				//	H-Blank starts
	BUS_startHDMA();
}
else if (RENDER_X == 341) {				//	PAL Line, usually takes up 341 dot cycles (unless interlace=on, field=1, line=311 it will be one additional dot cycle)
	RENDER_X = 0;
	if (++RENDER_Y == 241) {			//	V-Blank starts
		VBlankNMIFlag = true;
		Interrupts::set(Interrupts::NMI);
	}
	else if (RENDER_Y == 312) {			//	PAL System has 312 lines
		RENDER_Y = 0;
		VBlankNMIFlag = false;
		Interrupts::clear(Interrupts::NMI);
		BUS_resetHDMA();			//	A new frame will begin, we can safely reset our HDMAs now
	}
}
...
Now that we are already able to set/reset our HDMAs properly, and also already implented the function call to run the (enabled) HDMAs, we can now code the actual routine that handles the HDMA data. HDMA data is general is 1 byte that will show the line counter (bits 0-6) and if repeating is set (bit 7). Then, depending on the DMA mode that is set, read the appropriate amount of bytes and send them to the IO address.
The only difference with the indirect mode is, that it is a pointer to a HDMA data table (so it’s easier to point somewhere else for the game dev).
These info we can now easily put in our `BUS_startHDMA() function.
void BUS_startHDMA() {
	u8 dma_id = 0;
	for (u8 dma_id = 0; dma_id < 8; dma_id++) {
		if (HDMAS[dma_id].enabled && !HDMAS[dma_id].terminated) {
			if (--HDMAS[dma_id].line_counter == 0) {
				HDMAS[dma_id].repeat = memory[HDMAS[dma_id].address] >> 7;
				HDMAS[dma_id].line_counter = memory[HDMAS[dma_id].address] & 0x7f;
				HDMAS[dma_id].address++;
				if (HDMAS[dma_id].addressing_mode) {		//	0 - Direct, 1 - Indirect
					HDMAS[dma_id].indirect_address = (memory[HDMAS[dma_id].address + 1] << 8) | memory[HDMAS[dma_id].address];
					HDMAS[dma_id].address += 2;
					BUS_DMAtransfer(dma_id, HDMAS[dma_id].dma_mode, HDMAS[dma_id].directon, 0, HDMAS[dma_id].indirect_address, HDMAS[dma_id].IO, 100);
				}
				else {
					BUS_DMAtransfer(dma_id, HDMAS[dma_id].dma_mode, HDMAS[dma_id].directon, 0, HDMAS[dma_id].address, HDMAS[dma_id].IO, 100);
				}
				if (!memory[HDMAS[dma_id].address]) {
					HDMAS[dma_id].terminated = true;
				}
			}
		}
	}
}
BUS_DMAtransfer is only the split function that handles all the DMA modes and sends the final bytes to the IO address.
This is all there is to it, we have successfully implemented HDMAs. We can now successfully run more tests from krom.
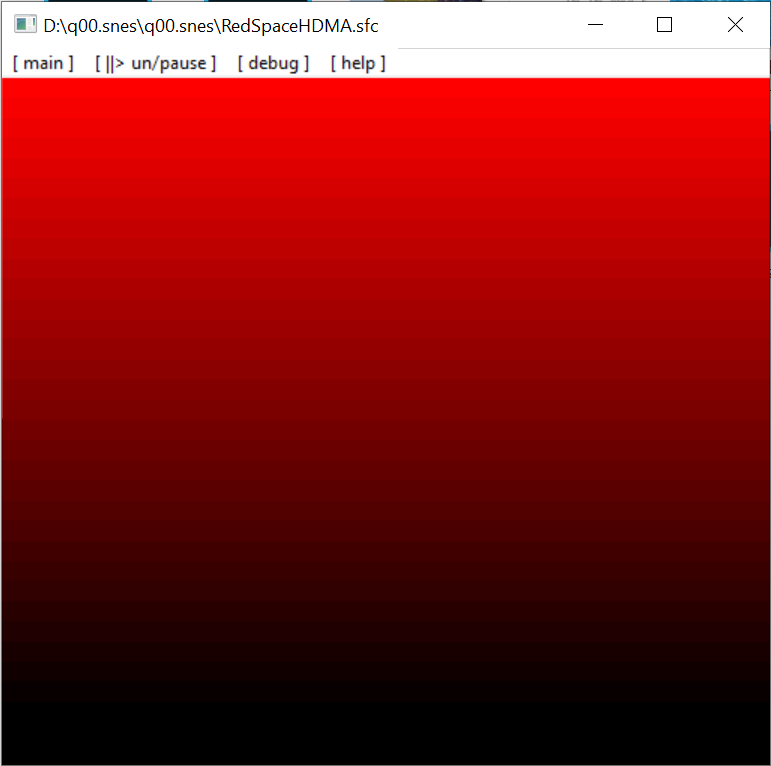
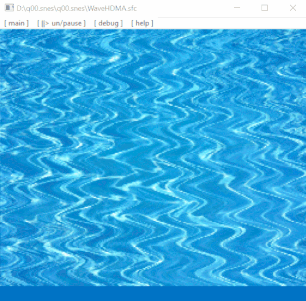
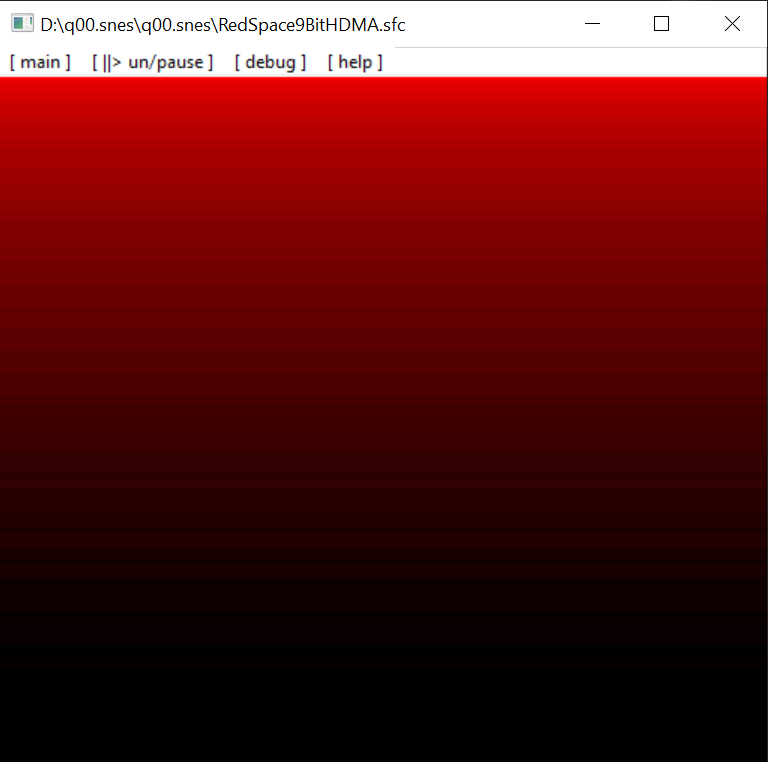
This one here is a bit more impressive (it uses blending of BG1 and the Backdrop color).
brightness
So, where does brightness come into play when we talk about HDMA? Well, there is a third HDMA test from krom, that actually makes use of the master brightness, and therefore I will talk about it right away as well.
Brightness is set by writes to register 0x2100. Where the lower 4 bits are the actual brightness (from 0b0000 – black, to 0b1111 full brightness). So, since up until we always assumed a full brightness, we will now with this additional information be able to darken certain stuff.
But first of all, how does the demo use the master brightness in regards to an HDMA effect, and how does it look without it?
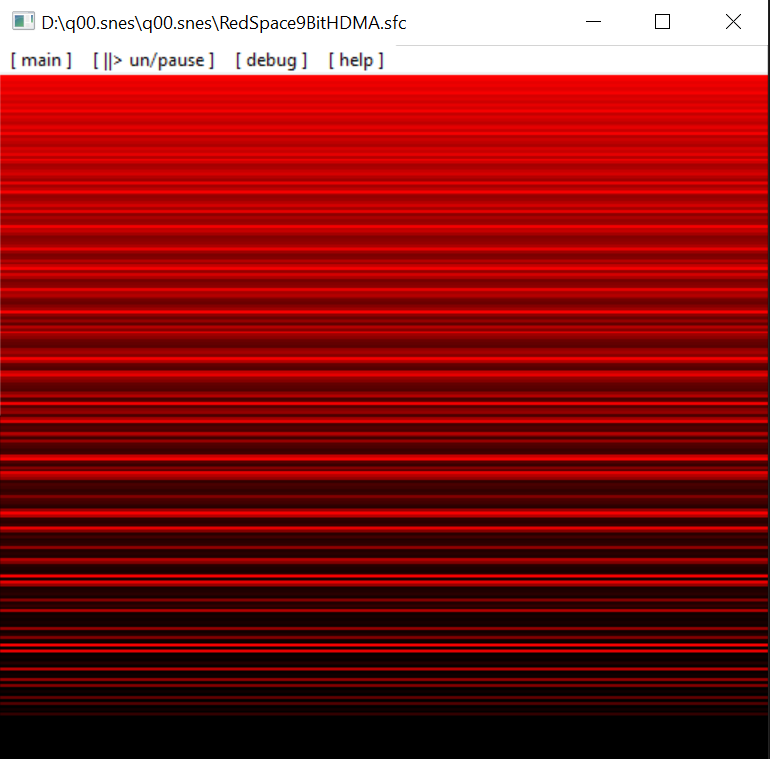
As you can see it looks all jaggy and not as smooth as the previous demo. But this is just the baseline. The trick krom uses here, is to use the brightness, with HDMA, to smooth out the lines that appear to bright right now, to create a smooth image effect. And yes this does work on real hardware (on a 2-chip SNES better than on a 1-chip SNES though).
So if we think of brightness as a factor between 0.0 and 1.0, we can just multiply it with the current color that we return – so it will be darkened appropriately.
With this implementation of the master brightness in place, we can run the demo again, and voila:
Now that looks a lot better and way smoother. You can still see it’s darker than the “original” one, because we only have the option to darken, not to brighten. But the effect is still really, really nice.
Comments