The SNES PPU offers a total of 4 Backgrounds that can be blended together depending on multiple settings. What can be displayed on those background also depends on the current mode that is selected.
The available modes are:
Mode   BG1         BG2         BG3         BG4
---------------------------------------------------------------------------
0      4-color     4-color     4-color     4-color   ;Normal
1      16-color    16-color    4-color     -         ;Normal
2      16-color    16-color    (o.p.t)     -         ;Offset-per-tile
3      256-color   16-color    -           -         ;Normal
4      256-color   4-color     (o.p.t)     -         ;Offset-per-tile
5      16-color    4-color     -           -         ;512-pix-hires
6      16-color    -           (o.p.t)     -         ;512-pix plus Offs-p-t
7      256-color   EXTBG       -           -         ;Rotation/Scaling

(thanks no$)
As you can see, the modes allow for different color-depths (and more) for each individual Background. This allowed the developers to choose the most fitting scenario for the current situation, to make the most out of the available hardware.
The mode can be set with writes to register 0x2105 (BGMODE), which will also determine the Tile size for each Background.
| 7 | BG4 Tile Size (0=8×8, 1=16×16) |
| 6 | BG3 Tile Size (0=8×8, 1=16×16) |
| 5 | BG2 Tile Size (0=8×8, 1=16×16) |
| 4 | BG1 Tile Size (0=8×8, 1=16×16) |
| 3 | BG3 Priority in Mode 1 (0=Normal, 1=High) |
| 2-0 | Screen Mode |
We can also enable or disable these Backgrounds with writes to the Register 0x212C
| 7-5 | not used |
| 4 | OBJ (0=Disable, 1=Enable) |
| 3 | BG4 (0=Disable, 1=Enable) |
| 2 | BG3 (0=Disable, 1=Enable) |
| 1 | BG2 (0=Disable, 1=Enable) |
| 0 | BG1 (0=Disable, 1=Enable) |
For the moment we will focus on the first 4 modes, which are the easiest to emulate and to get running. The hardest part later will be to have a properly working mode 7, which is responsible for Fake-3D, transformations, rotations and so on.
We already discussed the color depths in previous chapters, so the 4-color, 16-color and 256-color settings for Backgrounds should already be clear.
For easy access I made some constants, to make the rendering easier to read in the end.
const enum class PPU_COLOR_DEPTH {
	CD_2BPP_4_COLORS,
	CD_4BPP_16_COLORS,
	CD_8BPP_256_COLORS,
	CD_OFFSET_PER_TILE,
	CD_EXTBG,
	CD_DISABLED
};

const PPU_COLOR_DEPTH PPU_BG_MODES[][4] = {
	{PPU_COLOR_DEPTH::CD_2BPP_4_COLORS, PPU_COLOR_DEPTH::CD_2BPP_4_COLORS, PPU_COLOR_DEPTH::CD_2BPP_4_COLORS, PPU_COLOR_DEPTH::CD_2BPP_4_COLORS },		//	mode 0	-	2bpp, 2bpp, 2bpp, 2bpp	-	Normal
	{PPU_COLOR_DEPTH::CD_4BPP_16_COLORS, PPU_COLOR_DEPTH::CD_4BPP_16_COLORS, PPU_COLOR_DEPTH::CD_2BPP_4_COLORS, PPU_COLOR_DEPTH::CD_DISABLED},			//	mode 1	-	4bpp, 4bpp, 2bpp, -		-	Normal
	{PPU_COLOR_DEPTH::CD_4BPP_16_COLORS, PPU_COLOR_DEPTH::CD_4BPP_16_COLORS, PPU_COLOR_DEPTH::CD_OFFSET_PER_TILE, PPU_COLOR_DEPTH::CD_DISABLED},		//	mode 2	-	4bpp, 4bpp, OPT, -		-	Offset-per-Tile
	{PPU_COLOR_DEPTH::CD_8BPP_256_COLORS, PPU_COLOR_DEPTH::CD_4BPP_16_COLORS, PPU_COLOR_DEPTH::CD_DISABLED, PPU_COLOR_DEPTH::CD_DISABLED},				//	mode 3	-	8bpp, 4bpp, -, -		-	Normal
	{PPU_COLOR_DEPTH::CD_8BPP_256_COLORS, PPU_COLOR_DEPTH::CD_2BPP_4_COLORS, PPU_COLOR_DEPTH::CD_OFFSET_PER_TILE, PPU_COLOR_DEPTH::CD_DISABLED},		//	mode 4	-	8bpp, 2bpp, OPT, -		-	Offset-per-Tile
	{PPU_COLOR_DEPTH::CD_4BPP_16_COLORS, PPU_COLOR_DEPTH::CD_2BPP_4_COLORS, PPU_COLOR_DEPTH::CD_DISABLED, PPU_COLOR_DEPTH::CD_DISABLED},				//	mode 5	-	4bpp, 2bpp, -, -		-	512-pix-hires
	{PPU_COLOR_DEPTH::CD_4BPP_16_COLORS, PPU_COLOR_DEPTH::CD_DISABLED, PPU_COLOR_DEPTH::CD_OFFSET_PER_TILE, PPU_COLOR_DEPTH::CD_DISABLED},				//	mode 6	-	4bpp, -, OPT, -			-	512-pix plus Offset-per-Tile
	{PPU_COLOR_DEPTH::CD_8BPP_256_COLORS, PPU_COLOR_DEPTH::CD_EXTBG, PPU_COLOR_DEPTH::CD_DISABLED, PPU_COLOR_DEPTH::CD_DISABLED}						//	mode 7	-	8bpp, EXTBG, -, -		-	Rotation/Scaling
};
running and passing krom’s tests
For this paragraph we will make use of krom’s great PPU tests, which can be found here.
Luckily krom didn’t only supply CPU tests, but also some isolated tests for the PPU. Our goals is to complete those, and we will start with the most simple ones.
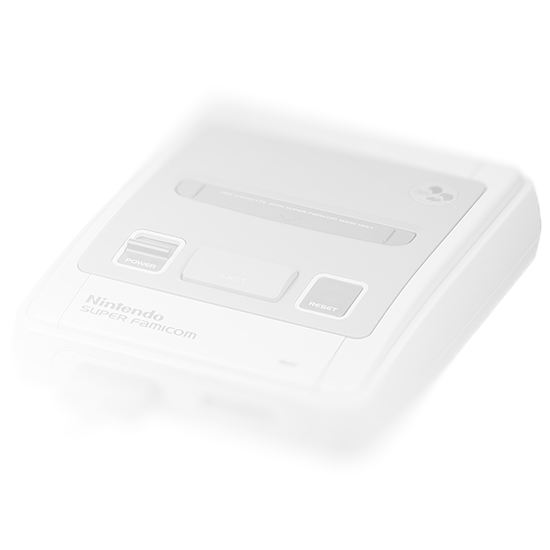
BG1/2/3/4 – 32×32 Tiles – 2BPP
This is the simplest PPU test available (there are 4, it’s all the same, but once on each available BG, to test they are working), and with the information we gathered in the last chapters, shouldn’t be that difficult to pass anymore.
As a baseline here is a (current) version of my rendering code for 2BPP (which already includes future features like scrolling and flipping):
void renderBGat2BPP(u16 scrx, u16 scry, u16 *BG, u16 bg_base, u8 bg_size_w, u8 bg_size_h, u8 bg_palette_base, u16 scroll_x, u16 scroll_y, u16 texture_width) {
	const u16 orgx = scrx;												//	store original x/y position, so we can draw in the FB to it
	const u16 orgy = scry;
	scry = (scry + scroll_y) % (8 * bg_size_h);							//	scroll x and y, and adjust for line/column jumps
	scrx = (scrx + scroll_x) % (8 * bg_size_w);

	const u16 offset =
		(((bg_size_w == 64) ? (scry % 256) : (scry)) / 8) * 32 +
		((scrx % 256) / 8) +
		(scrx / 256) * 0x400 +
		(bg_size_w / 64) * ((scry / 256) * 0x800);
	const u16 tile_id = VRAM[bg_base + offset] & 0x3ff;					//	mask bits that are for index
	const u8 b_palette_nr = (VRAM[bg_base + offset] >> 10) & 0b111;
	const u8 b_priority = (VRAM[bg_base + offset] >> 13) & 1;			//	0 - lower, 1 - higher
	const u8 b_flip_x = (VRAM[bg_base + offset] >> 14) & 1;				//	0 - normal, 1 - mirror horizontally
	const u8 b_flip_y = (VRAM[bg_base + offset] >> 15) & 1;				//	0 - normal, 1 - mirror vertically
	const u8 i = scry % 8;
	const u8 j = scrx % 8;
	const u8 v_shift = i + (-i + 7 - i) * b_flip_y;
	const u8 h_shift = (7 - j) + (2 * j - 7) * b_flip_x;
	const u16 tile_address = tile_id * 8 + v_shift;					//	this doesn't have tile_base like 8bpp, fix?
	const u8 b_hi = VRAM[tile_address] >> 8;
	const u8 b_lo = VRAM[tile_address] & 0xff;
	const u8 v = ((b_lo >> h_shift) & 1) + (2 * ((b_hi >> h_shift) & 1));
	writeToFB(BG, orgx, orgy, texture_width, getRGBAFromCGRAM(v, b_palette_nr, bg_palette_base, 2));
}
So after fiddling a bit with the code we should be able to get the proper screen:
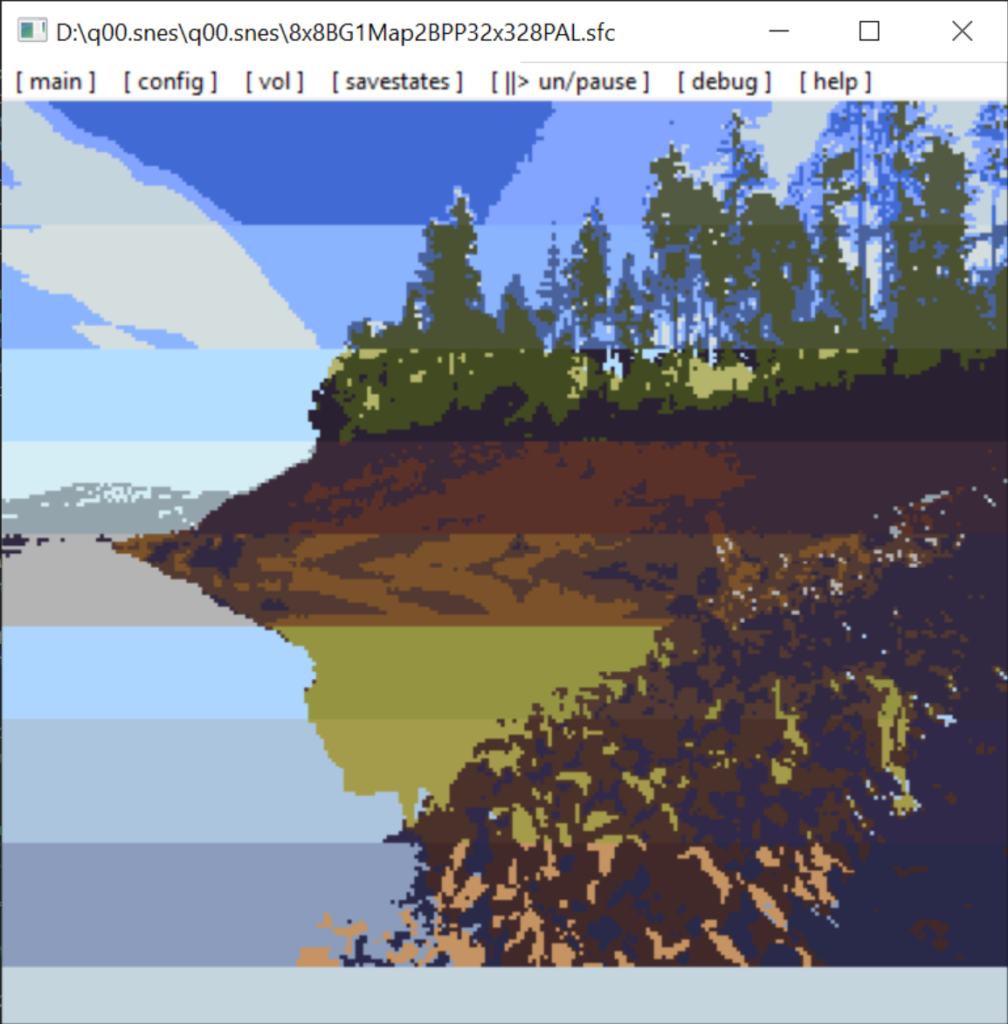
BG1 – 32×32 Tiles – 4BPP
The “only” change here is the color depths, so we have to adapt to that, and create our bitplanes from more data.
...
const u8 b_1 = VRAM[tile_address] & 0xff;
	const u8 b_2 = VRAM[tile_address] >> 8;
	const u8 b_3 = VRAM[tile_address + 8] & 0xff;
	const u8 b_4 = VRAM[tile_address + 8] >> 8;
	const u16 v =	((b_1 >> h_shift) & 1) +
			(2 * ((b_2 >> h_shift) & 1)) +
			(4 * ((b_3 >> h_shift) & 1)) +
			(8 * ((b_4 >> h_shift) & 1));
...
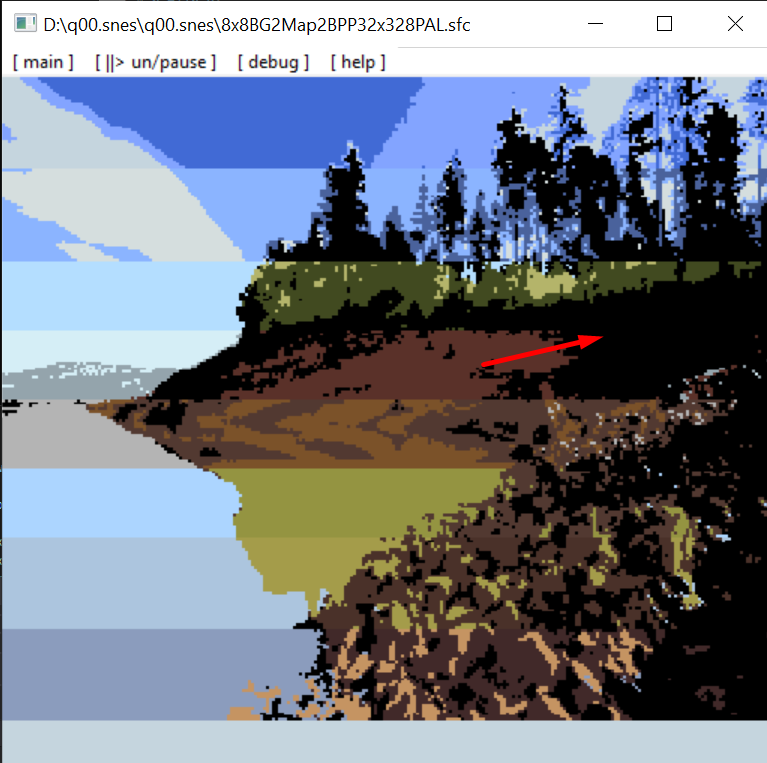
This should successfully give us the following output, which already looks a lot better than just 2BPP.
You can see some blue-ish pattern on the bottom row, that is because right now I am rendering a 256×256 window, which is bigger than the intended SNES resolution (NTSC and PAL), and therefore the bottom of the window will always show VRAM data that is not supposed to be rendered (this will be changed later in the development process).
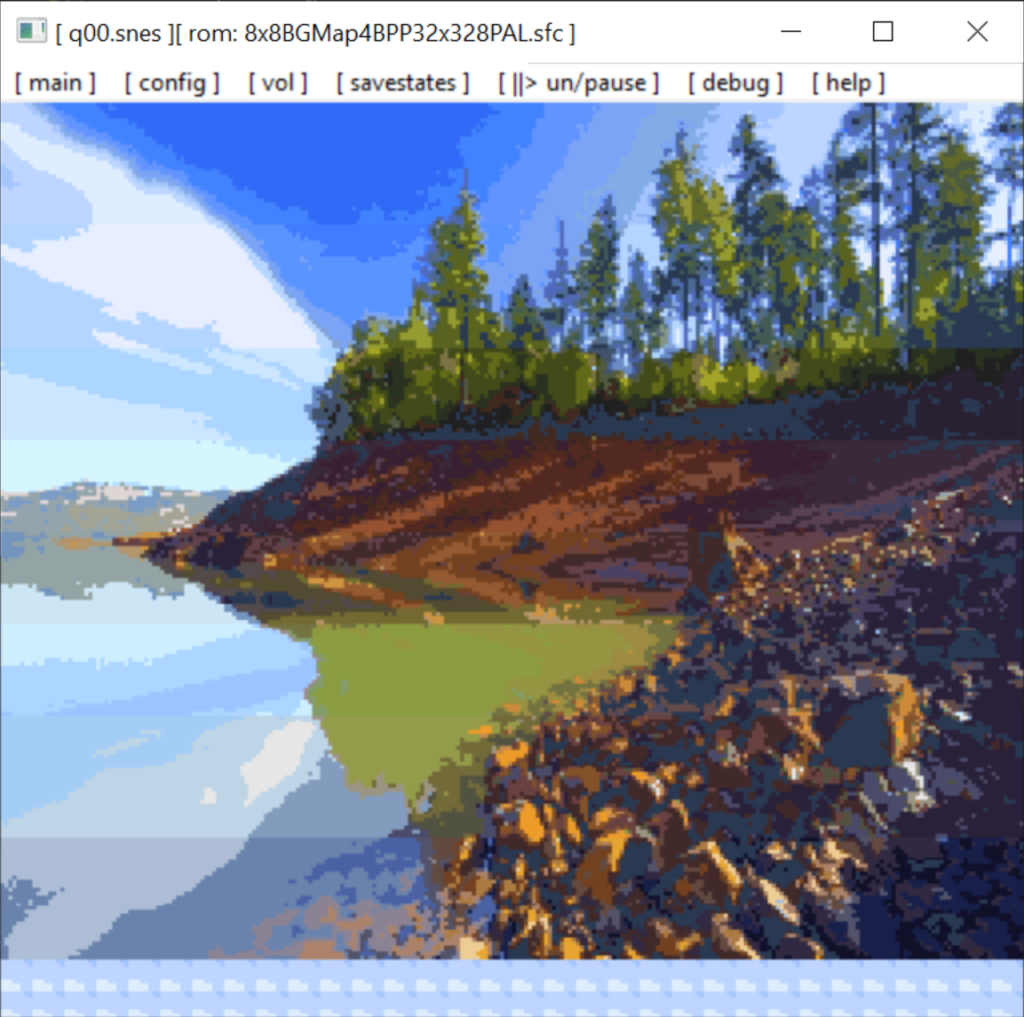
BG1 – 32×32 Tiles – 8BPP
Again, we must adapt to the greater color-depth here, and should be able to render this pretty soon again.
...
const u16 tile_address = tile_id * 32 + tile_base + v_shift;
	const u8 b_1 = VRAM[tile_address] & 0xff;
	const u8 b_2 = VRAM[tile_address] >> 8;
	const u8 b_3 = VRAM[tile_address + 8] & 0xff;
	const u8 b_4 = VRAM[tile_address + 8] >> 8;
	const u8 b_5 = VRAM[tile_address + 16] & 0xff;
	const u8 b_6 = VRAM[tile_address + 16] >> 8;
	const u8 b_7 = VRAM[tile_address + 24] & 0xff;
	const u8 b_8 = VRAM[tile_address + 24] >> 8;
	const u16 v =	((b_1 >> h_shift) & 1) +
			(2 *	((b_2 >> h_shift) & 1)) +
			(4 *	((b_3 >> h_shift) & 1)) +
			(8 *	((b_4 >> h_shift) & 1)) +
			(16 *	((b_5 >> h_shift) & 1)) +
			(32 *	((b_6 >> h_shift) & 1)) +
			(64 *	((b_7 >> h_shift) & 1)) +
			(128 *	((b_8 >> h_shift) & 1));
...
This will show up, and you can see another noticable increase in quality in comparison to the 4BPP test.
transparency & backdrop
As already mentioned, each color of each palette with the index 0 is transparency. The usual and general way the Backgrounds are sorted and rendered is illustrated in the following image:
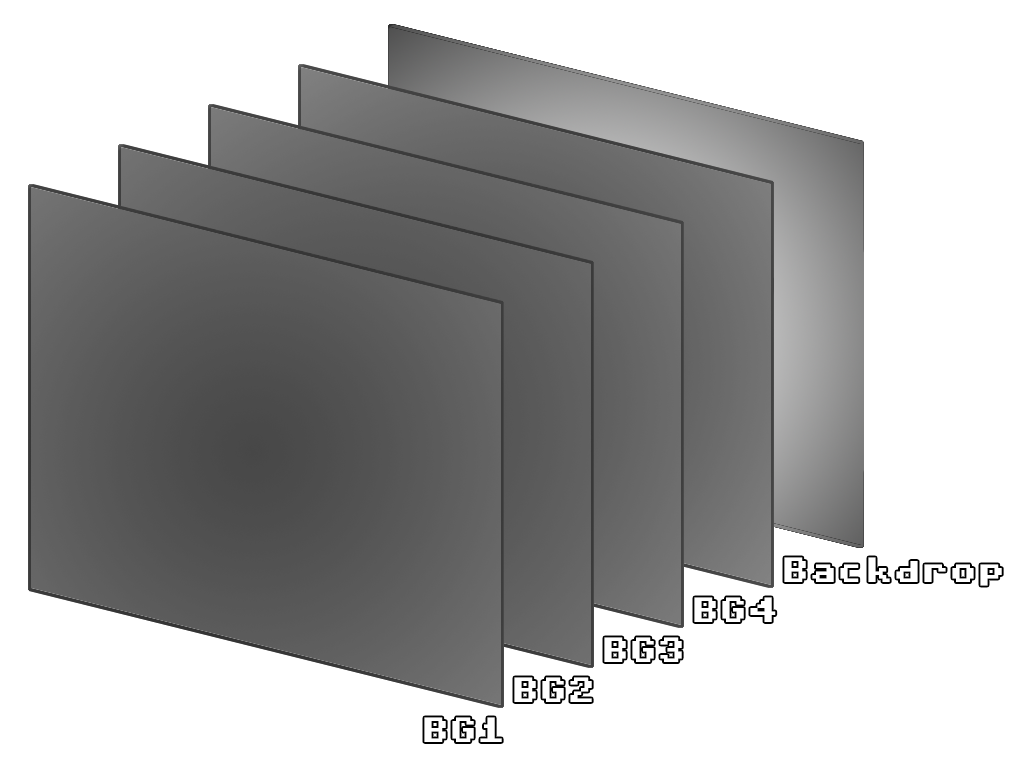
So, if Background 1 has a transparent pixel, the pixel just below in BG2 will be rendered. If BG2 has a transparent pixel there as well, BG3 will be rendered and so on. If there happen to be pixel where none of the background have an opaque pixel, a backup color, the so called Backdrop, will be rendered in this position. The backdrop color is always the color at absolute 0x00 in CGRAM.
With this implemented (SDL for example offers blending modes for this), the BG1/2/3/4 tests with 2BPP color depths show a little change:
To actually test the transparency and blending of our BGs we can utilize another one of krom’s tests, the Rings test.
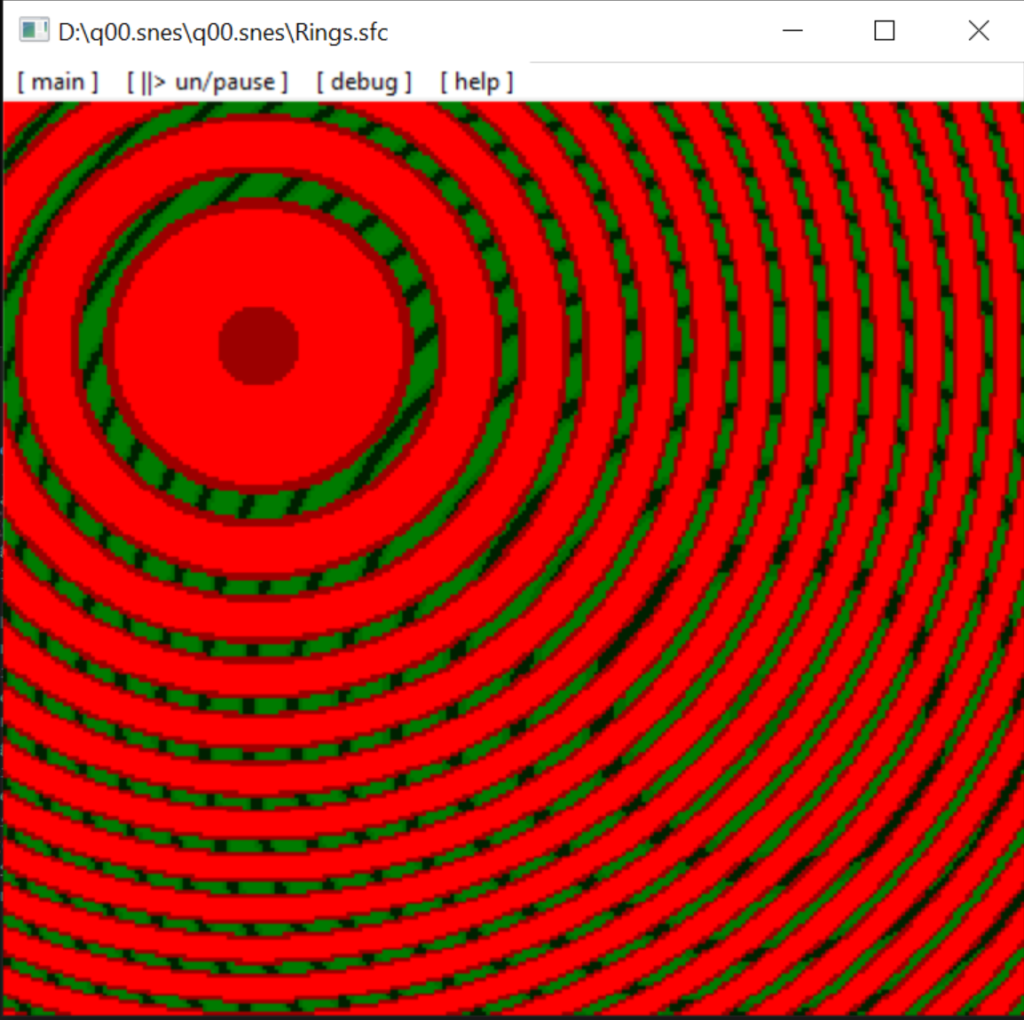
The red rings reside on BG1 while the green rings reside on BG2. Both have transparent areas, that’s why we can see parts of the green rings, and even Backdrop between the green rings themselves.
tilemap sizes
So far we have only been working with tests that have tilemap sizes of 32×32 Tiles. This is a very common size as it is enough to fill the entire screen with graphics. There are other tilemap sizes though, to, for example, already have map bigger than the screen. This is important to handle, as this will e.g. affect scrolling.
There are 4 available settings for the Tilemap size, these can be set through registers that also set the BG Base Addresses (already mentioned earlier):
0x2107 – BG1 Base Address
0x2108 – BG2 Base Address
0x2109 – BG3 Base Address
0x210A – BG4 Base Address
Bits 1-0 set the Tilemap Size, which relate to the following table:
| 00 | 32×32 Tiles |
| 01 | 64×32 Tiles |
| 10 | 32×64 Tiles |
| 11 | 64×64 Tiles |
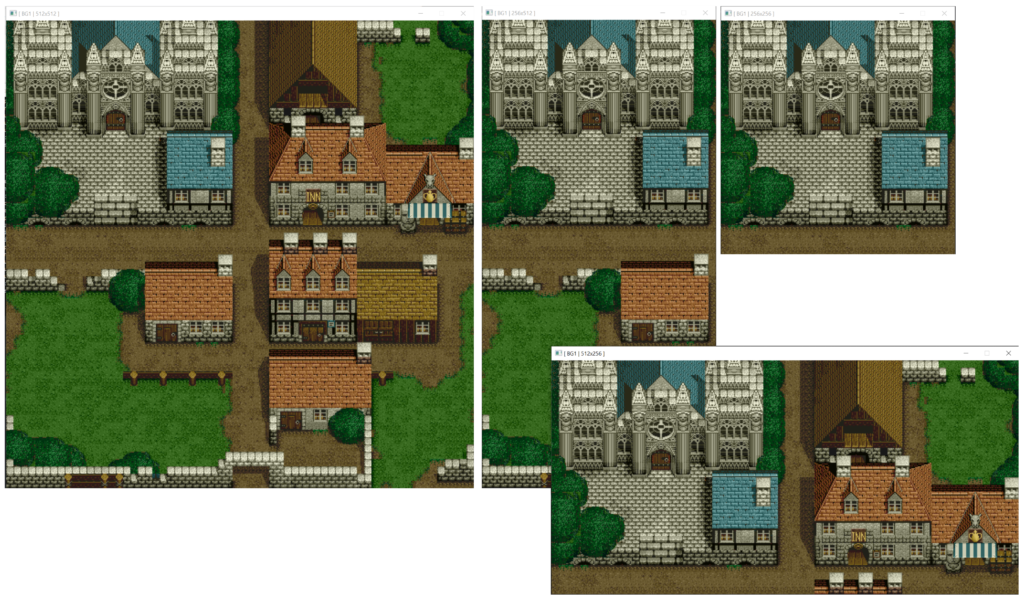
Since our actual screen only covers the 32×32 Tiles, I made some Debug functionalities, to display the whole available Tilemap next to the actual screen.
Krom has a test for each mode, and you are only able to see all of the (VRAM) Data with these additional functionality.
scrolling
If we are able to print Debug windows like that, our logical implementation should probably be good, but to test it properly, we will implement scrolling, to see if we see any clipping.
The part in the code above that is reliable for scrolling is this one:
...
const u16 orgx = scrx;												//	store original x/y position, so we can draw in the FB to it
const u16 orgy = scry;
scry = (scry + scroll_y) % (8 * bg_size_h);							//	scroll x and y, and adjust for line/column jumps
scrx = (scrx + scroll_x) % (8 * bg_size_w);
...
This will translate our coordinates to the actual scrolling values passed to the rendering function. We fetch the actual X- and Y-values for scrolling from the registers:
| 0x210D | BG1 Horizontal Scroll |
| 0x210E | BG1 Vertical Scroll |
| 0x210F | BG2 Horizontal Scroll |
| 0x2110 | BG2 Vertical Scroll |
| 0x2111 | BG3 Horizontal Scroll |
| 0x2112 | BG3 Vertical Scroll |
| 0x2113 | BG4 Horizontal Scroll |
| 0x2114 | BG4 Horizontal Scroll |
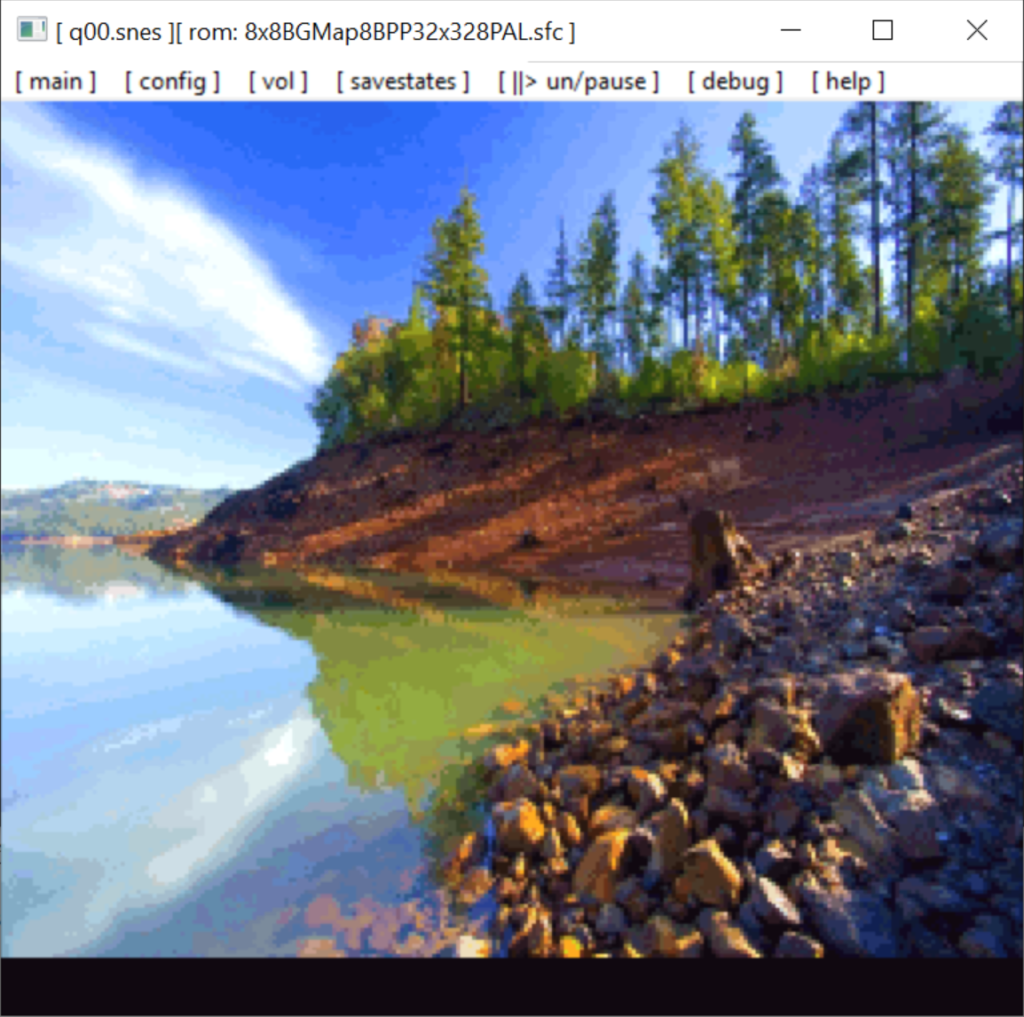
With our correct translation and the handling of writes to the above registers we are now able to handle scrolling for all 4 backgrounds properly. We can test this now with another 256-color test from krom, the 8BPP 32×32 test.
flipping
The last simple test we can conquer for now, is tile flipping. Every Tile can be flipped on the vertical axis, on the horizontal axis, or both.
We easily achieve this by reading from the other end of the byte (horizontal), or the other end of the byte-order (vertical).
...
const u8 v_shift = i + (-i + 7 - i) * b_flip_y;
const u8 h_shift = (7 - j) + (2 * j - 7) * b_flip_x;
...
Each Tile has 2 flags in its 16-bit value in the Tilemap, if bit 15 is set the Tile will be mirrored horizontally, if bit 14 is set it will be mirrored vertically.
Krom’s tileflipping test will confirm that our implementation worked properly.
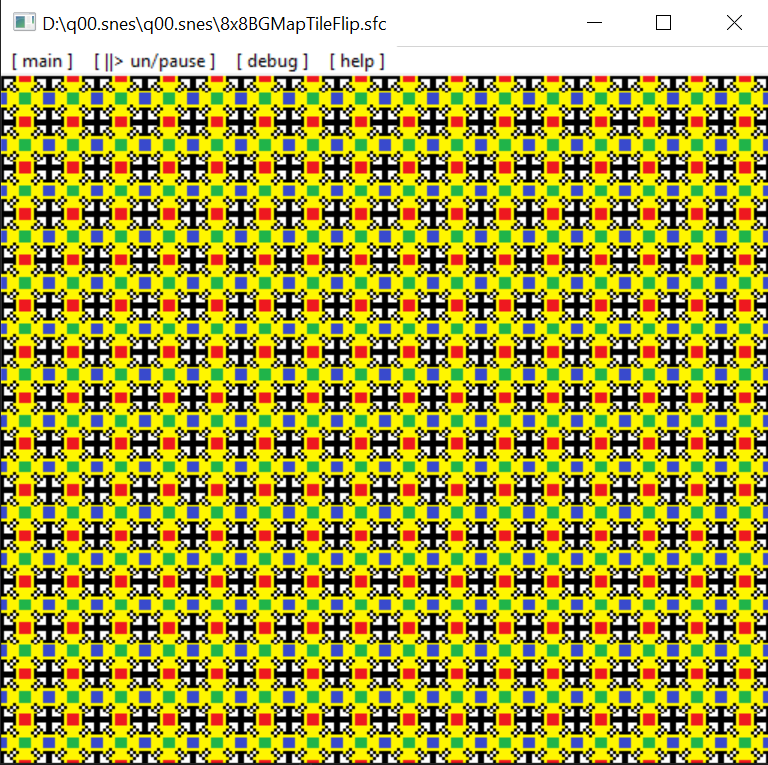
Since the white arrows point to all corners, the implementation was correct.
Comments